Fiamm horn install Yamaha XJ750J
Parts: one each hi note & low note Fiamm Freeway Blaster electric (not air)
horns, model number E, part number72102 & model F,
pt # 72112, $15.99 each at Pep Boys
One 30 amp auto relay, catalog # 275-226 from Radio Shack, I think it was
$5.50.
Approximately 3 feet each of 12 awg (not 18 gauge for the main hot wire!) wire
of several different colors (I used black blue purple & red 18
awg in the pics 'cause that's what I had, but I went back &
upgraded to 12 gauge wire later .)
One in-line 10 amp fuse, on hand, probably $1.50.
2 male & 4 female quarter inch spade connectors additional to those that
come with the horns- couple of bucks at R-shack
Hondalock 1, low strength liquid threadlock, (the blue kind) on hand, probably
about $3.
I didn't feel the need to reinvent the wheel so I studied carefully the
Fiamm tutorials at these links, existent in May 2001:
http://www.micro-delta.com/vmax/horn.htm
,
http://www.shadowriders.org/faq/fiamfaq.html
& http://www.angelfire.com/ok4/wingman26/hornwiring.html
. I'd like to acknowledge that I plagerized these tutorials & I also want
to include the required "do this at your own risk", YMMV statement,
cause that's what everyone seems to do. You're on your own to figure out
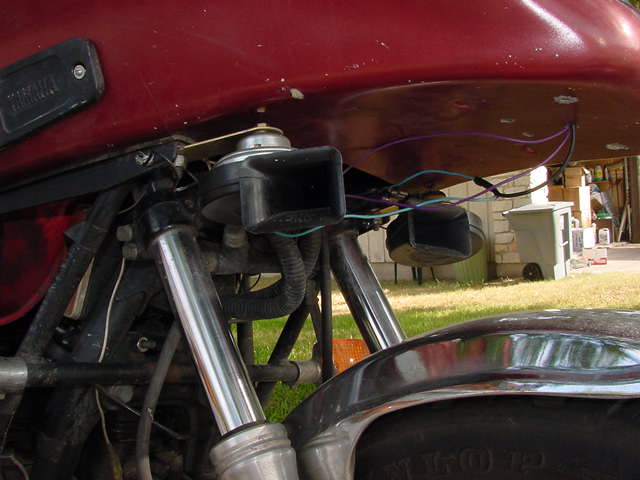
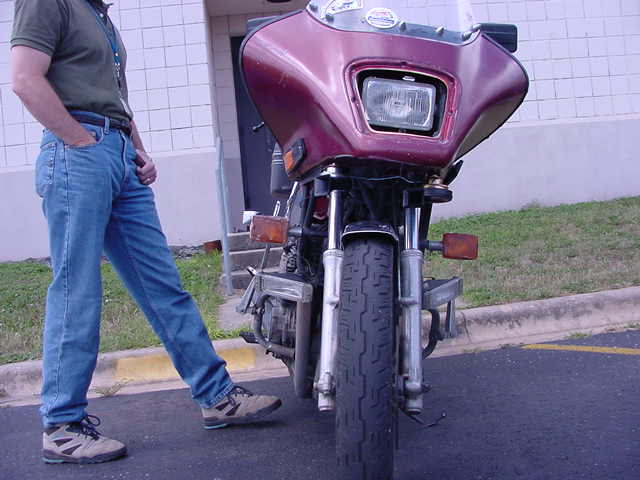
where you are going to mount these honkers. If you've got a fairing,
follow my lead (r-side horns closeup pic #1 & horns front view pic
#2). If no fairing, you can probably put them where the factory disc
horns were but you have to ground them to the frame, where the factory horns
aren't (explained later) .
I tried to mount mine on the underside of the nose of my factory fairing but
the weight of the horns fractured the fiberglass after one ride. I used
the flat brackets that come with the horns to mount them to the front most
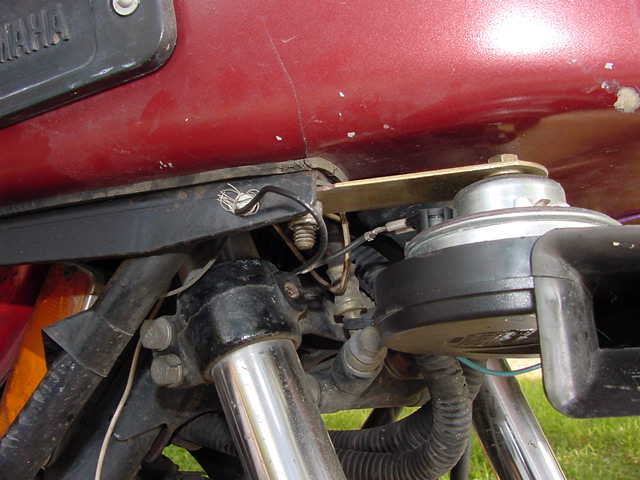
fairing-holding bolts. This was not a good, constant ground so I had to
ground the horns to the angle iron of the fairing frame by drilling a hole for
a grounding screw (horn to frame ground pic #3) . If you mount the horns
on the immoveable fairing as I did, you can't use the handy bolt at the triple
clamp for a ground- it moves as you turn the forks & the fairing doesn't
& it disconnects your ground wire. Don't ask me how I know.
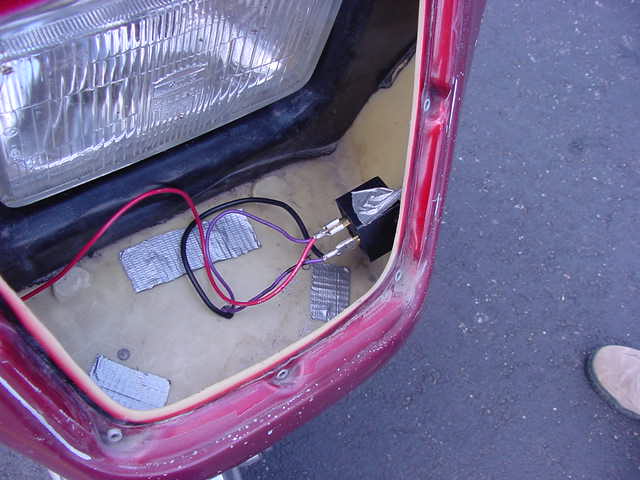
I mounted the relay & it's attendant wiring in the nose of my fairing (horn
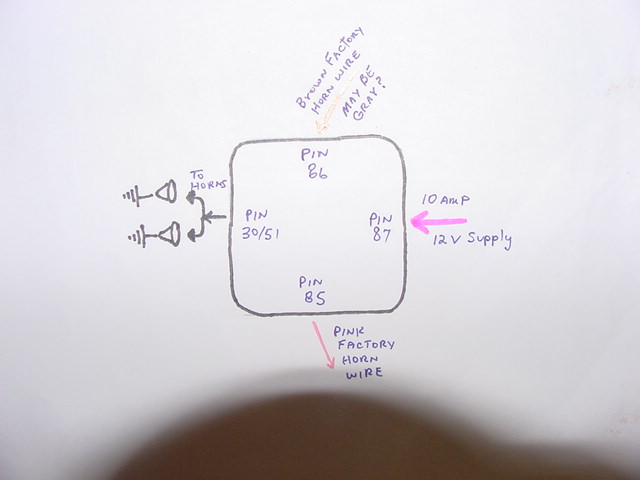
relay pic #4)The only variation for Yamaha XJ installation from the pretty
clear instructions & pin out diagram that come with the Radio Shack relay,
is that in order to use the factory horn button, you wire the ground pin of the
relay (#85) through the pink wire of one of your factory horn hook ups.
This is directly opposite the enclosed instructions for the relay which would
have you put your switch (horn button) in line at the 12 on.off switch pin
(#86). Since the XJ horn button takes the circuit to ground, (ie when the
horn is not being used, there is 12v power at the horn it's just not grounded
yet), you have to modify the Radio Shack instruction to put your
"switch" at the ground pin. My main power suppy to the relay
for the 12V in pin (#87) is a wire directly from the battery with the 10 amp
in-line fuse on it. The 4th pin, titled 12v out by Radioshack(#30/51) is
the higher amp power that is needed to activate these big honkers. I
grounded one pin of each horn to the frame. The switching 12 volt supply,
described as the on/off switch 12v by Radio Shack (#86) is from the other wire
that originally went to my factory horn. At the horn, on my XJ750J, this
wire is actually brown. On the XJ CD V 1.0, diagram, it is indicated to
be gray. Theres a generic diagram of a slightly different model Radio
Shack relay pin out in the angelfire link above, BUT THAT IS NOT HOW I WIRED MY
HORNS.
So eventually (horn relay schematic pic #5), I have the supply side, low amp,
12v of the factory horn wire (brown) to pin 86; the high amp
straight-from-the-battery 12 v supply (don't forget the in-line 10 amp fuse)
hooked to pin 87; the ground, pin 85 hooked to the factory horn button wire
(pink), which when the horn button is activated, takes that pink wire to
ground; and the high amp, 12v out at pin 30 hooked to one terminal of each
horn, in parallel, not series. The other terminal of each horn goes to a
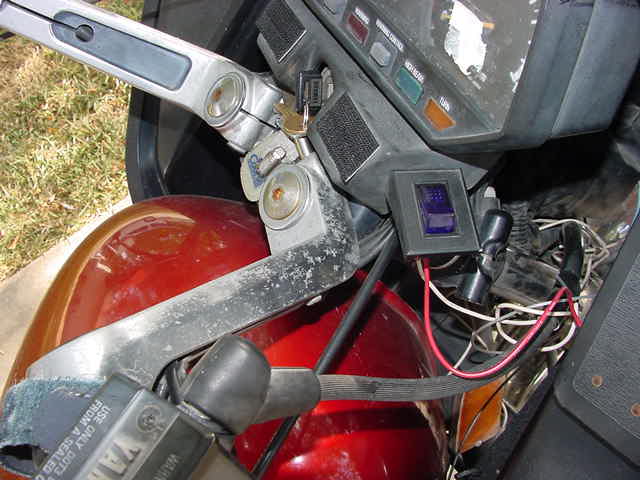
good, constant, ground on the bike frame. I also routed the high amp
supply through a rocker switch [used to be aux lights] at the handle bars [horn
rocker switch pic #6] so there wouldn't be 10 amps of unswitched 12 volts
floating around inside my fairing. If I forget to turn it on, I only have
one pathetic factory horn at work.
Don't do this install without the relay. I.e., don't send the 10 amp
potential to one side of the horn and then simply ground the other pin of the
horn through the pink horn button wire. This will probably make the
horn(s) honk but you will almost certainly fry your factory horn button which
was designed for the much lower amperage requirements of the pathetic, factory
horns, my bike sounds like a full grown car horn- it's great.